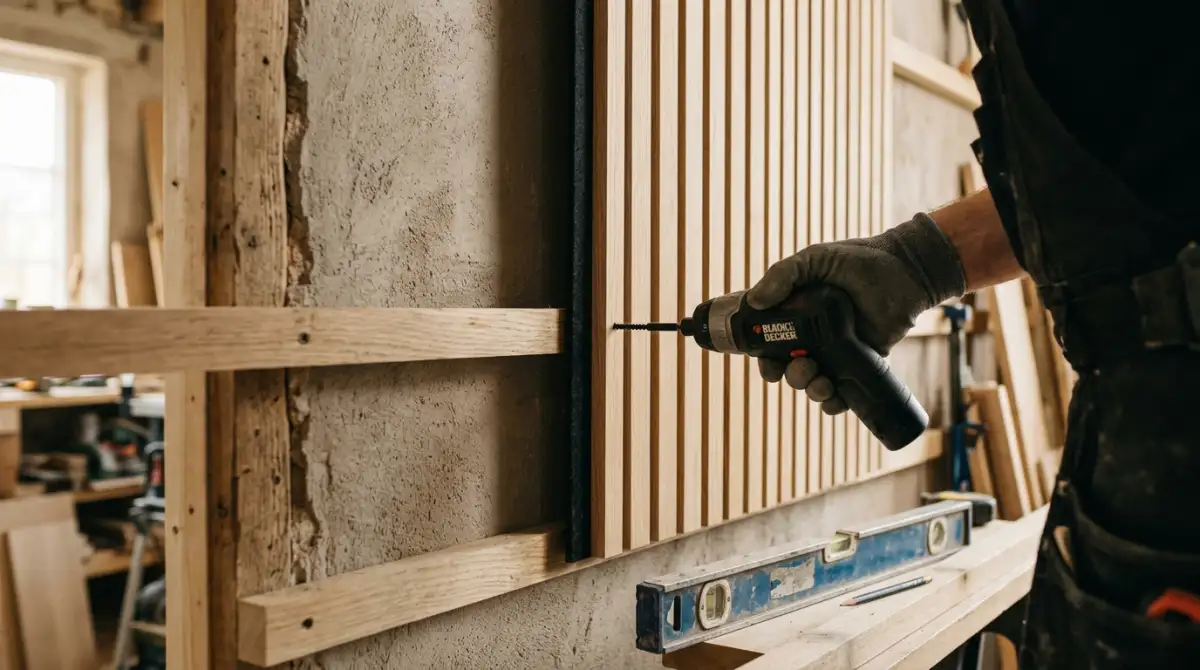
To fit acoustic wall panels, set out a plumb starting line, then screw each panel through the felt in the gaps between slats into studs or battens. Add adhesive where the wall is flat and sound. Battens let you level uneven walls and add insulation behind. Plan sockets, edges and trims before the first panel goes up.
Key takeaways
- Screws into studs or battens are the primary fixing on walls; adhesive is an optional addition, never the only fixing on a ceiling.
- Fix through the felt in the slat gaps so screw heads disappear into the shadow lines.
- Battens give a flat plane over uneven walls and a cavity for mineral wool that improves low-frequency absorption.
- Check for hidden cables and pipes before drilling, and get sockets brought forward properly.
- Dry-lay and number the panels first to keep slat rhythm and grain consistent.
Last reviewed: October 2026 by the Linegrain specification team.
Which fixing method should you use?
There are three common ways to fit acoustic slat panels to a wall. The right one depends on the wall, how flat it is and how much acoustic performance you want.
| Method | Best for | Advantages | Limitations |
|---|---|---|---|
| Screws direct to studs or solid wall | Flat stud walls and plastered masonry | Fast, mechanically secure, panels can be removed later | Follows any bow in the wall; stud positions must suit the panel layout |
| Adhesive plus screws | Flat, sound, clean walls where you want a tight fit to the surface | Holds the panel in place while fixing; fewer screws visible | Panels are hard to remove; adhesive must suit both the felt and the wall |
| Battens (with or without mineral wool) | Uneven walls, masonry, home cinemas, studios, rooms needing more bass absorption | Levels the plane, creates a service void, improves low-frequency absorption | Adds depth (batten plus about 21 mm panel); more time and materials |
For the acoustic reasons behind batten mounting, see do acoustic slat panels work. For adhesive choice by substrate, see our guide to the best adhesive for acoustic wall panels.
What tools and materials do you need?
- Measuring and set-out: tape, long spirit level or laser level, pencil, chalk line, stud and cable detector.
- Cutting: fine-tooth saw (mitre saw, track saw or circular saw with guide), sharp utility knife with spare blades, multi-tool or jigsaw for socket openings. Cutting technique is covered in how to cut acoustic slat panels.
- Fixing: cordless drill-driver, black screws long enough to pass through the panel and reach well into the stud or batten, wall plugs or masonry fixings to suit the wall, adhesive gun and cartridges if bonding.
- Battens (if used): straight, dry timber battens, packers for levelling, mineral wool slabs sized to the batten depth.
- Finishing: end-cap or edge trims, a few spare slat offcuts as spacers, filler or touch-up for cut ends if you are not using trims.
- Protection: safety glasses, dust mask suited to wood dust, gloves for handling, a dust-class vacuum.
A standard Linegrain panel measures 2400 × 600 × about 21 mm, with 12 mm MDF slats on a 9 mm PET felt backing. At 2.4 m long, a panel is awkward for one person to carry and position, especially on a ladder. The HSE’s manual handling guidance notes that the law sets no fixed weight limit; the risk depends on the load and the task, so plan a two-person lift for long panels and for anything at height.
Step-by-step: how to fit acoustic wall panels
1. Let the panels settle and check the delivery
Unpack the panels in the room where they will be installed and let them adjust to its temperature and humidity before fitting, following the supplier’s instructions. Check every panel for transit damage, and lay them side by side to see colour and grain. Number them on the back in the order you want them on the wall; this matters most for real wood veneer, where adjacent panels should flow naturally.
2. Find studs, cables and pipes
Mark stud centres with a detector and confirm with a small pilot hole where the board will be covered. Then look for services. The IET’s guidance on cables concealed in walls explains that cables may be run in zones within 150 mm of the top of a wall or of a corner, and horizontally or vertically in line with an accessory such as a socket or switch. Treat those zones as no-drill areas unless you have confirmed what is behind them. Also look for pipes running to radiators and to kitchen or bathroom fittings.
3. Plan the layout
Measure the wall width and divide it by 600 mm to see how many full panels fit and how wide the end pieces will be. Aim for equal cut pieces at both ends, or a full panel at the most visible edge such as beside a door or at a feature corner. Check the height: a 2400 mm panel suits most rooms, while 2700 and 3000 mm lengths are available for taller walls. Our guide to acoustic panel sizes and coverage includes a worked layout.
4. Fit battens (if using them)
Fix battens horizontally so the vertical slat panels cross several of them, at regular centres from just above the floor to just below the ceiling. Use packers to bring every batten into one flat plane, checking with a long straight edge. On a stud wall, screw battens through to the studs. British Gypsum’s GypWall specification gives a maximum stud spacing of 600 mm, which conveniently matches the 600 mm panel width, but always locate the actual studs rather than assuming the spacing. If you want maximum absorption, fit mineral wool between the battens before panels go on.
5. Set out the first panel
Walls and corners are rarely true, so do not start from the corner blindly. Snap a plumb line where the first full panel’s edge will land, then scribe the first panel to the corner if needed. A first panel that is out of plumb puts every slat line after it out of plumb.
6. Apply adhesive (optional)
If bonding, apply adhesive to the felt back in vertical beads behind the slat lines. Keep beads away from the panel edges so adhesive does not squeeze out at joints. Use a product the manufacturer approves for the wall surface, and respect its open time.
7. Position and screw the panel
Offer the panel up against the plumb line with a small gap at the floor and ceiling. Drive screws through the felt in the gap between slats into each stud or batten the panel crosses, with fixings near the top, middle and bottom of each fixing line. Do not overtighten: the head should just pull the felt firm, not crush it into a dimple.

8. Join the next panels
Butt the next panel tight to the first so the joint gap matches the 13 mm gap between slats. A slat offcut held across the joint is a quick check that the rhythm continues. Re-check plumb every two or three panels.
9. Deal with sockets and switches
Isolate the circuit before removing any faceplate. Measure the box position from the previous panel and the floor, transfer it to the panel face, and cut the opening. The accessory then needs to be brought forward to the new face, typically with an extension or spacer box so the faceplate sits flat. Approved Document P explains when electrical work in dwellings in England must be notified. If in doubt, ask an electrician.
10. Finish the edges
Exposed ends and sides look best with a matching end cap or trim, or with a cleanly cut slat end that has been touched up. Where panels meet the ceiling, a small shadow gap usually looks neater than trying to scribe tight to an uneven ceiling. At external corners, either mitre the panel ends or use a corner trim.

What about ceilings?
Slat panels can be fitted to ceilings, but only with mechanical fixings into joists or a properly fixed batten grid. Adhesive is not a safe fixing overhead on its own: for example, the Sika Multi Stick technical data sheet instructs that overhead applications should always be combined with mechanical fixings. For slatted ceilings designed for that job, look at our wood slat acoustic ceiling panel.
Common mistakes to avoid
- Starting from an out-of-square corner without checking plumb.
- Screwing into plasterboard only instead of into studs, battens or solid masonry with suitable fixings.
- Drilling without a service check in the cable zones around sockets, switches and wall corners.
- Mixing panels from different batches on the same wall without checking colour first.
- Relying on adhesive on dusty, painted or uneven walls where the bond is only as good as the surface layer.
- Cutting indoors without dust control. MDF and wood dust need extraction and suitable respiratory protection.
Specifying panels for an installation team
For contractors and distributors, consistent panels make installation faster: straight slat lines, consistent gap width, and matching edge trims in the same finish. Linegrain makes acoustic slat panels such as the natural oak acoustic slat wall panel to order in 2400, 2700 and 3000 mm lengths, with fire-retardant or moisture-resistant MDF on request.
FAQ
Can you screw acoustic slat panels straight onto plasterboard?
Screw into the studs behind the plasterboard, not into the board alone. Find the studs, mark their centre lines and fix through the felt in the slat gaps into the timber or metal stud. Where studs do not line up with the panel, fix battens to the studs first and screw the panels to the battens.
Should I use adhesive or screws for acoustic wall panels?
On walls, the most dependable method is screws into studs or battens, with adhesive as an optional addition that stops panels moving while you fix them. Adhesive alone can work on sound, flat, clean walls if the adhesive maker approves the substrates. On ceilings, always use mechanical fixings.
Do the screws show on a slat panel?
Not if you place them correctly. Drive the screw through the felt in the gap between slats, so the head sits below the slat faces in a shadow line. Black screws on dark felt are hard to see from normal viewing distance.
How do I fit acoustic panels around a plug socket?
Isolate the circuit, remove the faceplate, mark the box opening on the panel, cut it out, and have the accessory brought forward to the new wall face with a suitable extension box. If you are not competent with electrical work, use an electrician; in England some work in dwellings must be notified under Approved Document P.
Planning a fit-out with slat panels? Tell us the wall heights, finishes and quantities, and we will quote panels and matching trims for your installers. Request a quote.